
>>ADJUST MICROPHONE<<
Hello everyone. Thank you for attending this session.
Over the years, I’ve delivered a more basic version of this session at many national dialysis conferences. When Ted asked me to deliver this for you - because of your existing experience with test strips - it was clear that it would be more appropriate to deliver an advanced version of the session.
To address your more experienced needs, we will split this session into two segments. In the first segment, I will deliver this presentation in which the basics have been omitted in favor of more practical advanced information.
In the second segment of this session, Bruce Fife and I will point out specifics with regard to RPC test strips and answer your questions. We have a lot to cover, so to stay on schedule we will move quickly through these slides. >>NEXT<<
Copyright RPC - Vern Taaffe, 2008, 2009, 2010, 2011, 2012, 2013, 2014, 2019
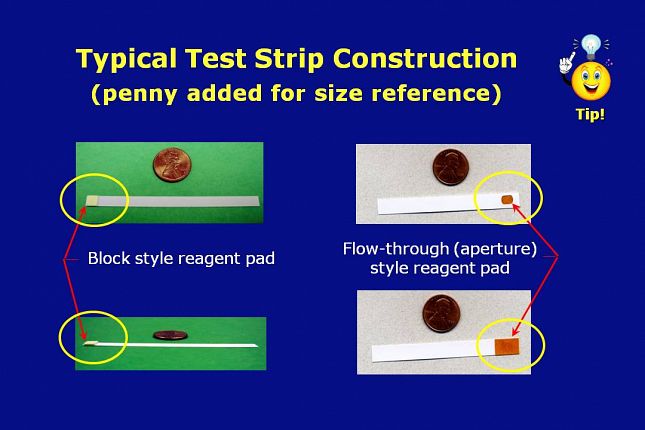
Okay, let’s get started by examining the typical construction of test strips used in dialysis.
Test strip reagent areas are impregnated with a complex mixture of chemicals that can include enzymes, polymers, surfactants, buffers and indicators. The chemicals control the ability of the reagent area to pick up the sample, enhance the color intensity, provide stability, and reduce the tendency of the colors to run off the pad.
>>NEXT<<
The strip shown on the left has the reagent pad mounted on top of a solid plastic strip.
>>NEXT<<
The aperture type strip on the right has a hole in the reagent pad mount area of the plastic strip. This allows the test sample to flow-through the pad for increased absorption.
>>NEXT<<
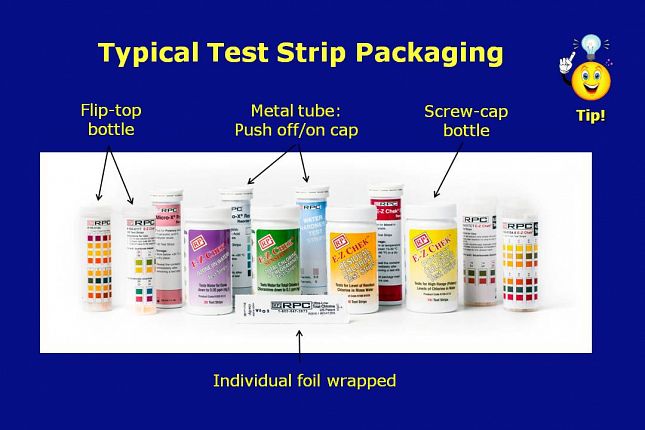
Here’s a picture of each of the most common packaging configurations.
RPC has replaced the flat pack packaging – which is not shown here - with the much easier to use flip-top bottle – >>NEXT<< shown at the far the left in this picture.
>>NEXT<<
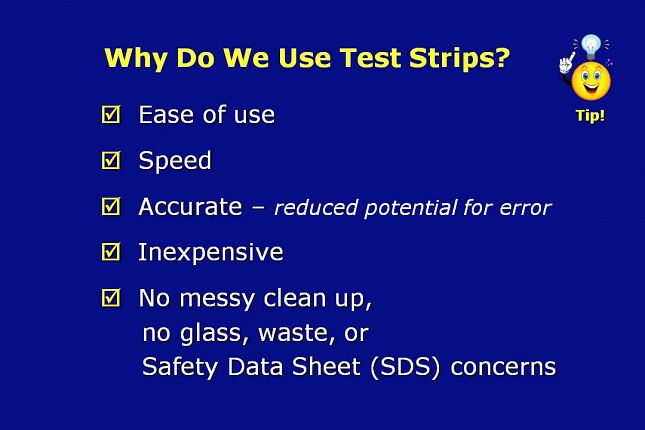
Why are test strips so well accepted and appropriate for use in dialysis test applications?
They are an easy to use, fast, and cost effective means of accurately testing dialysis fluids. Use of a test strip typically eliminates the potential human errors associated with the multi-step procedures required for lab kit type testing and as a result reduces the risk potential for the patient.
>>NEXT<<

How do test strips work? >>NEXT<<
In a typical assay, you dip the reagent area into a sample for a specified time period, remove it, and compare the color of the reagent area with a color chart. The time period to complete a test with a test strip is typically between 5 and 60 seconds. >>NEXT<<
Some test strips work by indicating the presence or absence of a color change at a threshold concentration, or by measuring a color or electrochemical change with a meter.
Test strips change colors because the presence of the specific parameter in the sample, causes a chemical reaction that leads to a change in the color of one or more of the chemicals in the reagent area of the strip.
>>NEXT<<
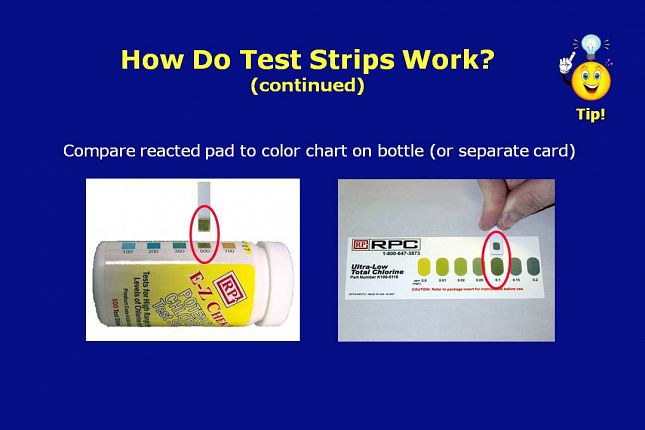
On the left, is a potency chlorine test strip that was tested in a standard reference solution known to have 500 ppm chlorine in water. >>NEXT<<
The color on the reacted reagent pad properly matches the 500 ppm color block on the bottle label.
On the right, is a total chlorine residual test strip that was tested in a standard reference solution known to have 0.1 ppm chloramine in water. >>NEXT<<
The color on the reagent pad properly matches the 0.1 ppm color block on the color card packaged with the test strips.
>>NEXT<<

This slide shows a schematic drawing of a representative dialysis operation with typical testing locations in the water treatment area, >>PAUSE<< >>NEXT<<
the dialysis machine area, >>PAUSE<< >>NEXT<<
and the dialyzer reprocessing area…which in the United States today is much less prevalent when compared with dialyzer reprocessing in the 1990s. >>PAUSE<<
This schematic represents a general example. Your testing routine may vary from that shown here.
>>NEXT<<
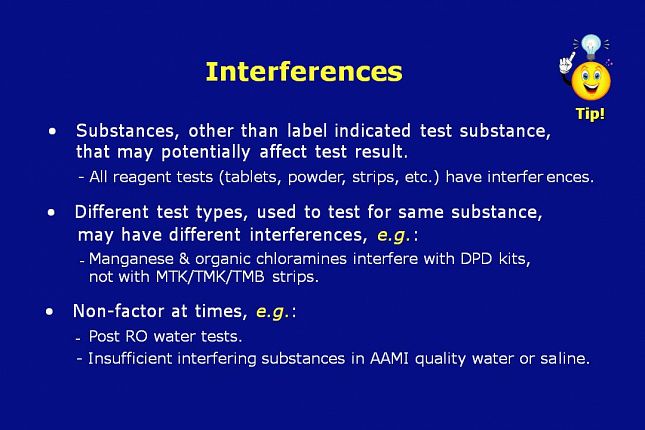
>>NEXT<< Interferences are substances, other than the label indicated test substance, that may potentially affect the test result. All reagent tests (tablets, powder, strips, etc.) have interferences. Tests based on oxidation technology are likely to be interfered with by oxidizers other than the label indicated test substance. For example: A chlorine test would be expected to be interfered with by peroxide and a peroxide test by chlorine. >>NEXT<<
Different test types, used to test for the same substance, may have different interferences. For example:
Manganese and certain organic chloramine compounds interfere with DPD kit reagents, but not with the RPC TMK reagent type total chlorine test strips. This is important to know when performing total chlorine testing between carbon tanks. If the water under test has manganese or organic chloramines in it, you may get a false positive with the DPD kit.
>>NEXT<<
Be aware of whether or not the test you are performing may be exposed to a potential interfering substance listed in the IFUs for that test. >>NEXT<<

RPC test strips – when used properly – have been shown to be comparable in accuracy to analytical instruments. >>NEXT<< They are manufactured and released using standard reference procedures. For example, reagent strip results for chlorine are required to closely match results that are obtained when the same sample is analyzed using amperometric titration per the Standard Method of Wallace and Tiernan or using established and well proven chlorine standard reference solutions. >>NEXT<<
RPC test strips minimize errors by having fewer end user procedural steps compared to liquid, tablet, and powder test kits and electronic devices. >>NEXT<<
With regard to chlorine tests specifically, it is important to note that high pH of the water sample under test can effect all total chlorine tests negatively. In addition, it has been shown that high pH water can reduce the ability of carbon to remove chloramines. The AAMI TIR58 for Water Testing Methodologies recommends a source water pH range of 6.0 to 8.0. Using the 60 second dip time, the RPC Ultra-Low™ Total Chlorine Test Strips will not be negatively impacted unless the pH of the water under test exceeds 8.5. That said, in 70 million Ultra-Low tests of chlorine in water for dialysis over the past eight years, RPC has not had a single reported patient issue. >>NEXT<<
Are there factors that can affect test strip performance and…
are there steps the end user should take to ensure test strip accuracy?
>>NEXT<<
YES!...Definitely.
There are specific, well-defined steps the end user should take to ensure test strip accuracy.
>>NEXT<<
The factors that affect test strip performance can be controlled by taking the steps outlined on the following slides.
>>NEXT<<
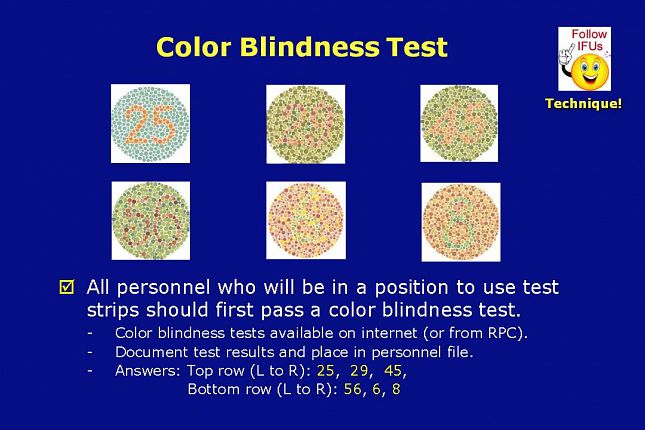
Can you see the numbers inside each circle? >>PAUSE<< It’s important to note here that even with normal color vision, this projector may distort the colors making it difficult to see the numbers.
>>NEXT<<
All personnel who will be in a position to use test strips should first pass a color blindness test.
Color blindness tests are available on the internet or from your test strip vendor.
The test results should be documented and placed in the personnel file.
Answers: Top row (L to R): 25, 29, 45,
Bottom row (L to R): 56, 6, 8
>>NEXT<<
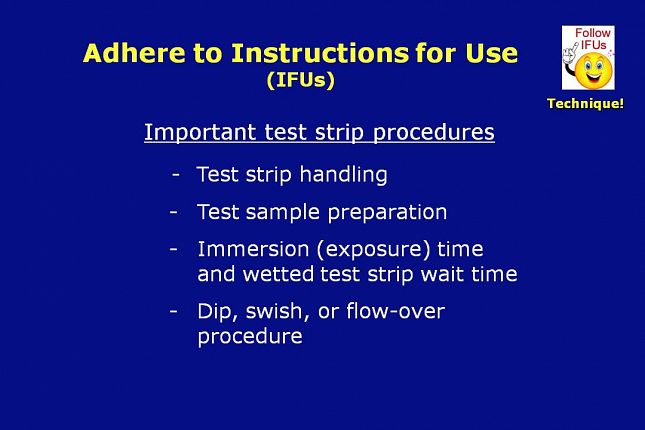
Convenience and ease of use of test strips can lead a careless end user to ignore the use instructions for the specific test strip that he or she is using. This can be a major issue, and can lead to incorrect results. There are important use procedures to keep in mind for each test strip type that you are using.
These procedures include: >>NEXT<< Test strip handling, >>NEXT<< Test sample preparation, >>NEXT<< Reagent area immersion time and wetted test strip wait time >>NEXT<< and the Dip, swish, or flow-over procedure.
>>NEXT<<
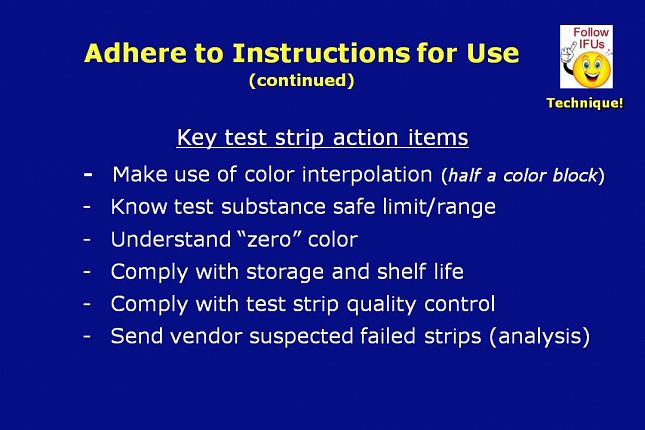
In addition to the important test strip procedures, listed on the prior slide, there are key test strip action items that should be considered essential.
These action items include: >>NEXT<<
Making use of color interpolation (within half a color block) >>NEXT<<
Knowing the test substance safe limit/range >>NEXT<<
Understanding the “zero” color >>NEXT<<
Complying with storage and shelf life requirements >>NEXT<<
Complying with test strip quality control requirements >>NEXT<<
And sending any suspected failed strips back to the vendor for analysis
>>NEXT<<
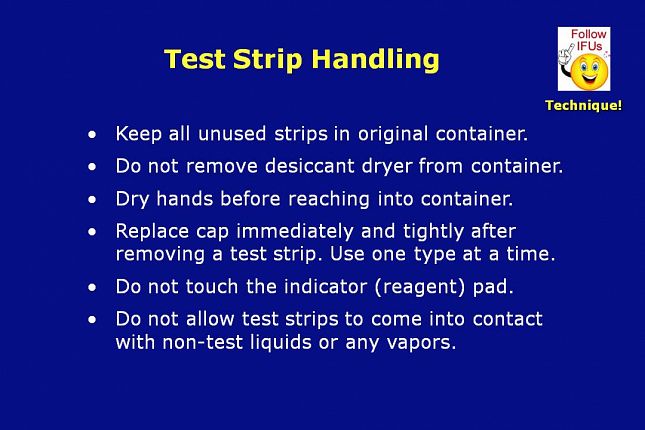
Let’s take a look at each of these procedures and action items…starting with Test Strip Handling: >>NEXT<<
Be sure to keep all unused strips in their original container. >>NEXT<<
Do not remove the desiccant dryer from the container. >>NEXT<<
Dry your hands before reaching into the container. >>NEXT<<
Replace the container cap immediately and tightly after removing a test strip. >>NEXT<<
Do not touch the indicator (reagent) pad. >>NEXT<<
and Do not allow test strips to come into contact with non-test liquids or any vapors.
>>NEXT<<
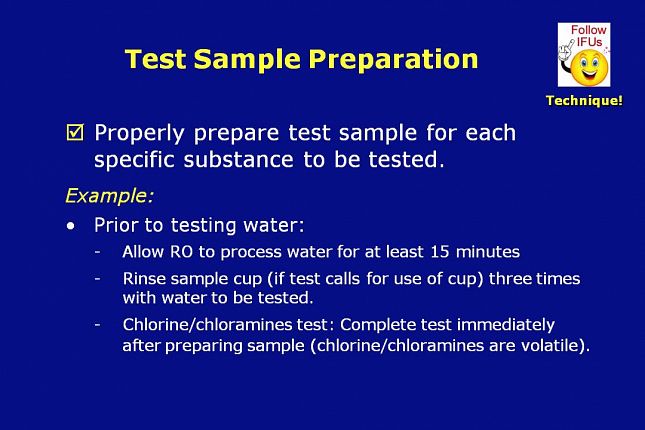
Be sure to properly prepare the test sample for each specific substance to be tested.
For example:
Prior to testing water:
Allow the RO to process water for at least 15 minutes
If the test calls for the use of a sample cup, rinse the cup three times with the water to be tested.
If you are testing for chlorine, complete the test immediately after preparing the sample as chlorine and chloramines are volatile.
Prior to testing a reprocessed dialyzer for residual peroxyacetic acid:
Carefully follow the germicide manufacturer’s or clinic validated rinse procedure
>>NEXT<<
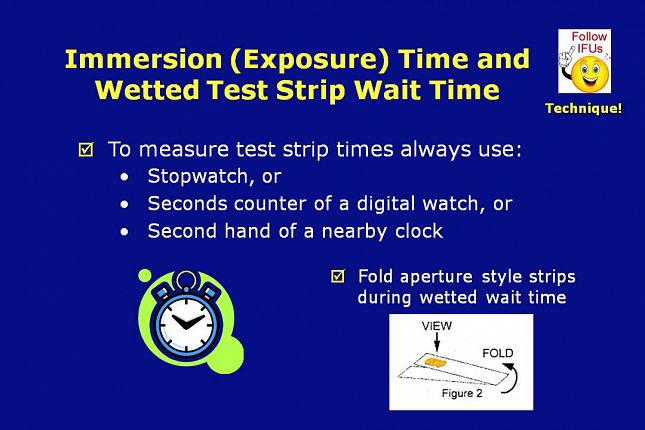
When measuring immersion times or wetted test strip wait times, always use a timing device such as a stopwatch, the seconds counter of a digital watch, or the second hand of a nearby clock.
As called for in the instructions for use, aperture style test strips should be folded in half end-to-end during the wetted test strip wait time. Folding the strip in half, gives better color discernment by placing a white background behind the reagent pad.
Some test strip types require that the results be interpreted immediately after removing the test strip from the fluid sample…and therefore do not have a wetted wait time.
>>NEXT<<
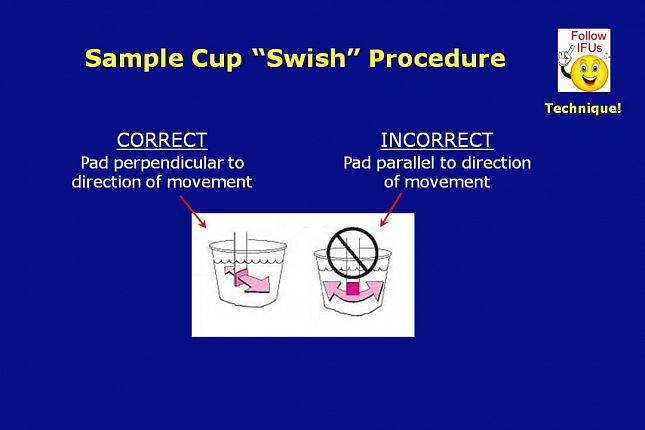
For some test strip types, use of a sample cup is called out in that test strips’ Instructions for Use. When a sample cup is utilized, the instructions for use typically require the testing person to move the test strip back and forth within the sample under test.
When moving or “swishing” the test strip reagent pad in a sample cup, it is very important that the full surface of the pad be moved back and forth in the fluid sample. Moving the thin edge of the strip back and forth causes the sample fluid to flow parallel to the reagent pad and may cause insufficient wetting of the pad.
In procedures where a test strip is held under a fluid stream, make sure the fluid stream flows slowly and directly on top of the full surface of the pad, rather than on the thin side or edge of the pad.
>>NEXT<<
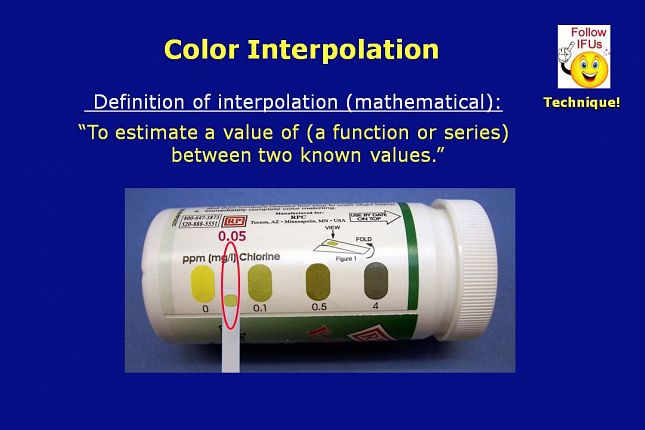
Sometimes the sample being tested has a concentration that is not exactly the same as one of the concentration levels printed on the color chart. In that situation, the sample concentration is easily determined by interpolating, or estimating the value, between the nearest color blocks on either side of the activated reagent strip color.
In the picture on the slide, hopefully this computer projector combination allows you to see that the color of the activated reagent pad is clearly less than the 0.1 ppm color and greater than the “zero” color. >>NEXT<<
The color development could be estimated, or interpolated, as halfway between zero and 0.1 ppm. Therefore the result would be estimated at 50 percent of 0.1 ppm which is 0.05 ppm.
The test strip color chart shown here has good color differentiation between the zero and 0.1 ppm color blocks. Because of the projector distortion, it’s best to look at the actual bottle label to see the color difference.
>>NEXT<<
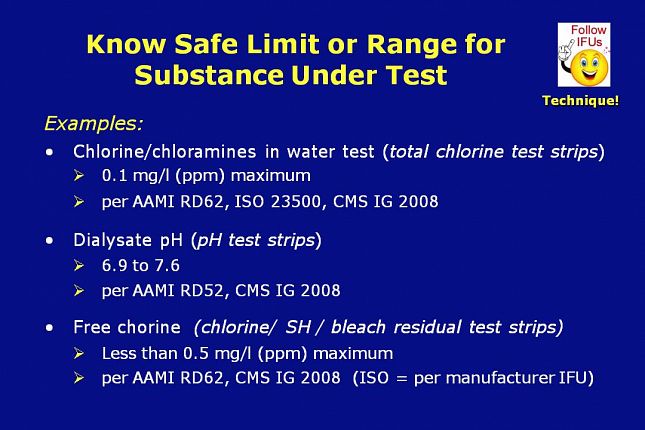
For each substance tested, there is a target safe limit, safe range, or safe value that the test result should be compared with.
To ensure patient safety, it is important to be certain of what that limit, range, or value is, for each test you perform. Three examples are shown on this slide:
For a chloramines (total chlorine test) in water test, the limit is 0.1 ppm per AAMI RD62. ISO 23500, and CMS.
For dialysate pH, the range is 6.9 to 7.6 per AAMI RD52 and CMS.
For free chlorine - as in sodium hypochlorite or bleach – the limit is 0.5 ppm per AAMI RD62 and CMS.
ISO 23500 defers to the dialysis machine and dialysis test strip manufacturers to specify the residual free chlorine limit. RPC will continue to specify 0.5 ppm for free chlorine.
All RPC test strips are made specifically for use in dialysis and are certified as spot on at the dialysis maximum allowable level for the substance under test.
>>NEXT<<
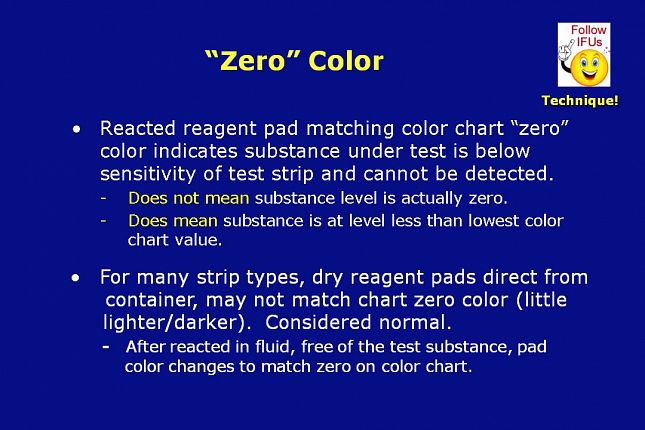
OK. Here’s a good question for you. What does “zero” color mean? >>PAUSE<< >>NEXT<<
It means that a reacted reagent pad - matching the color chart “zero” color - indicates the substance under test is below the sensitivity of the test strip and cannot be detected.
It does not mean that the substance level is actually at zero.
It does mean that the substance is at a level less than the lowest color chart value.
>>NEXT<<
For many test strip types, the dry reagent pads direct from the container, may not match the chart zero color. The pads may be a little lighter or darker. This is considered normal.
After the pad is reacted in fluid free of the test substance, typically the pad color changes to more closely match the zero on the color chart.
>>NEXT<<
The effectiveness of all reagent strips and liquid test reagents degrades over time. Dating the product and using it within the specified date and storage conditions is necessary to assure proper product performance and quality.
Store test strips in a low humidity environment.
An optimal environment would have less than 50% relative humidity at a standard room temperature between 70 and 75 degrees Fahrenheit. A temperature range of 59°-86°F is acceptable for most test strips. However, be sure to check the instructions for use for each different test strip type that you are using in your clinic.
Do not remove the desiccant dryer from the test strip container. >>NEXT<<
Shelf life is typically 2 to 3 years after the date of manufacture.
- Some vendor’s test strips – other than RPC’s - have a reduced shelf life upon opening
the container. This is indicated in their Instructions for Use if applicable.
As long as the cap on bottled strips is replaced immediately after removing a test strip, all RPC test strips retain the expiration date printed on the packaging with no loss of expiration date.
- The test strip lot number and expiration date are printed on each container.
The expiration date takes into consideration minor degradation that may occur as a
result of limited exposure to temperature extremes during shipment of the strips.
- Do not use any test strips beyond their expiration date.
>>NEXT<<
>>NEXT<<
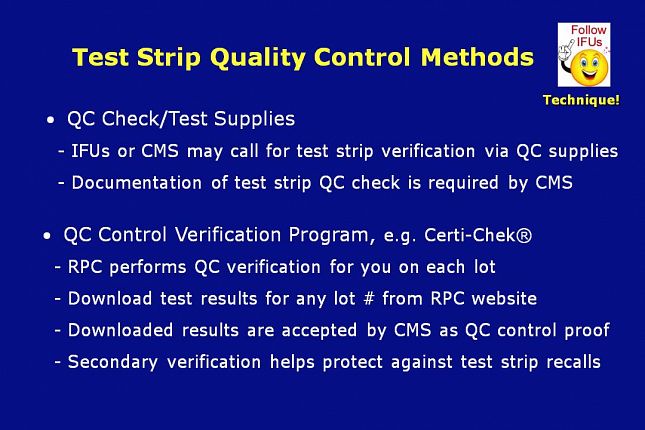
Some non-RPC test strip instructions for use – or a CMS auditor - may call for verification of test strips through the use of QC test supplies. The QC test supplies may be packaged in with the test strip kits, or they may be ordered separately, for use in test strip verification checks at the clinic.
Historically…documentation of QC verification for test strips has been required by CMS.
>>NEXT<<
A well accepted option to performing the test strip QC verification in your clinics is a unique QC Control Verification Program created by and in place at RPC. For all test strips shipped from RPC the dialysis verification is performed for you. Certi-Chek® is the name of the program.
Lot-by-lot test results can be downloaded from RPC’s Web site.
Test result documents downloaded from the RPC website are accepted by CMS.
It’s also important to note that this secondary dialysis specific lot verification program can help protect against test strip recalls. >>PAUSE<<
OK. We’ve covered test strip tips and techniques. On the next few slides let’s take a look at the test strip “taboos”. >>NEXT<<
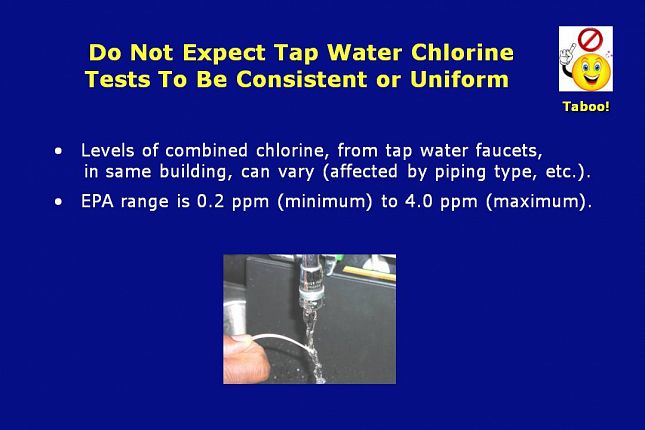
Do not expect test results for tap water in chlorine to be consistent or uniform.
Levels of chlorine/chloramines, from tap water faucets in the same building, can vary because chlorine is volatile and the level is affected by piping materials and other factors.
In addition, the raw water provider may allow the level of chlorine/chloramines to vary anywhere within the EPA range of 0.2 ppm (minimum) to 4.0 ppm (maximum).
Expectation that a total chlorine test strip should always show a relatively consistent chlorine value in tap water is not realistic.
>>NEXT<<
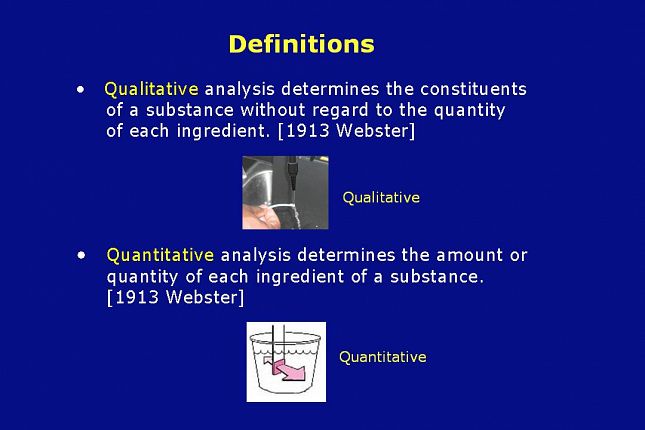
Here are a couple of helpful definitions associated with tests performed in dialysis. >>NEXT<<
A chemical qualitative analysis determines the constituents of a substance without regard to the quantity of each ingredient. [1913 Webster]. Said another way it is a type of presence or indicator test. In tests using test strips, this is typically a test wherein the solution being tested – such as water – contacts the reagent pad via a fluid stream. >>NEXT<<
A chemical quantitative analysis determines the amount or quantity of each ingredient of a substance. [1913 Webster]. In tests using test strips, this is a test that requires the tester to collect a specific sample volume size for the test. >>NEXT<<

Never use a qualitative test for tests requiring low end precision.
Qualitative & semi-quantitative procedures may both be listed in the test strip Instructions for Use.
At the lowest measurement value or color block, the precision of the qualitative test may be affected by the speed of the sample flow.
Precision is defined as repeatability, or the ability to repeat the test with consistent results.
For some test strip procedures the sample volume is not critical; yet for other test strip procedures the sample volume is critical. Quantitative tests call for a specific test sample volume. To eliminate any possibility of sample size error, always use the exact sample volume called out in the test strip’s Instructions For Use.
To minimize the potential for error and mitigate patient risk, all RPC test strip IFUs call out a quantitative test procedure.
>>NEXT<<
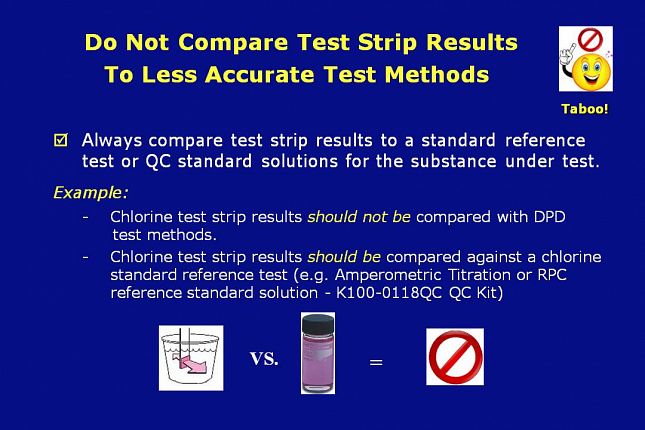
Do not compare test strip results to less accurate test methods
Always compare test strip results to a standard reference test or a QC standard solution for the substance under test.
For example:
Chlorine test strip results should not be compared with DPD test methods.
Chlorine test strip results should be compared against a chlorine standard reference test such as amperometric titration or a fresh standard solution - of a known value - that is traceable to a standard reference test. For RPC total chlorine test strips use the RPC QC test kit part number K100-0118QC.
>>NEXT<<
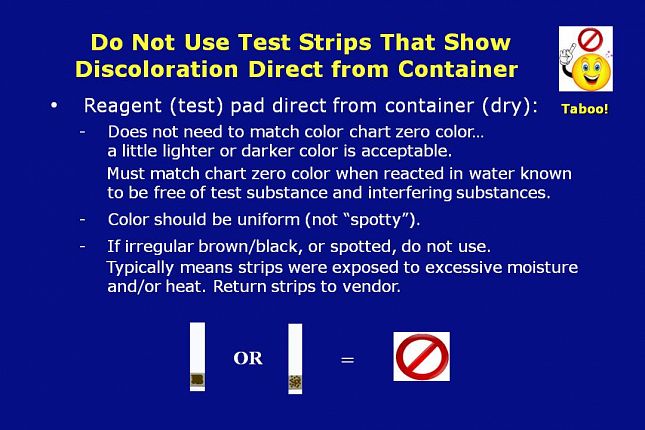
Do not use test strips that show discoloration direct from the container
Reagent test pads direct from the container do not need to match the color chart zero color. A little lighter or darker color is acceptable. The test pad color must match the chart zero color when reacted in water known to be free of the test substance and any interfering substances.
The reagent pad color should be uniform, not “spotty”.
If the pad is irregular brown or black, or spotted, do not use the test strips from that container.
Discoloration of this nature typically means the strips were exposed to excessive moisture and/or heat. Return the test strips to the vendor for analysis.
>>NEXT<<
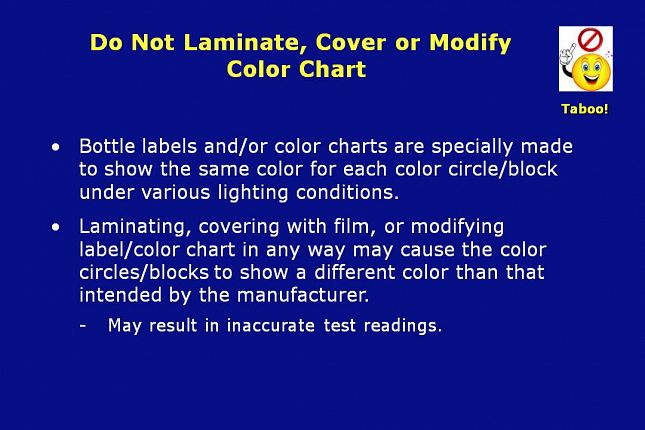
Bottle labels and/or color charts are specially made to show the same color for each color circle/block under various lighting conditions.
Laminating, covering with film, or modifying the label or color chart in any way may cause the color circles/blocks to show a different color than that intended by the manufacturer…
- and this may result in inaccurate readings.
>>NEXT<<

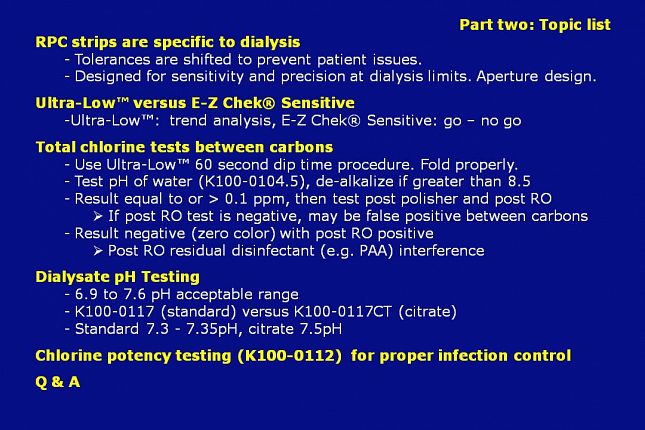
Okay, let’s end the slide presentation and start the interactive question and answer segment of this session. On the next slide is a list of topics we would like to discuss in the Q & A segment.
>>NEXT<<
Bruce Fife is at the sample display table. As we discuss each topic, Bruce will pass around the associated test strips. After we complete this topic list, Bruce and I will answer any questions you may have.